When I was first trying to break into wedding photography, the main thing I was worried about was whether or not I even had enough gear… or the right gear… to do an awesome job for both my clients AND the work I provided for other photographers. The last thing I wanted to do was to work alongside another professional and have them say, “Oh, just grab your ‘X’ lens for this part of the day,” and freeze in a panic because I didn’t own that piece of equipment. I didn’t always own all of this wedding photography gear when I shot my very first wedding. I started off with some basic pieces and slowly built up my beloved inventory.
Want to see EXACTLY what I have in my bag? Check out the Amazon links at the end of this article so that you can go straight to each piece of equipment!
As I go through my wedding photography gear list with you, I’m going to point on which gear I think if vital and which gear is more of a “nice-to-have” piece. In my last blog post geared towards Photography Education, I went over which lenses I recommend purchasing first (depending upon what you photography the most of) and what I mainly use them each for.
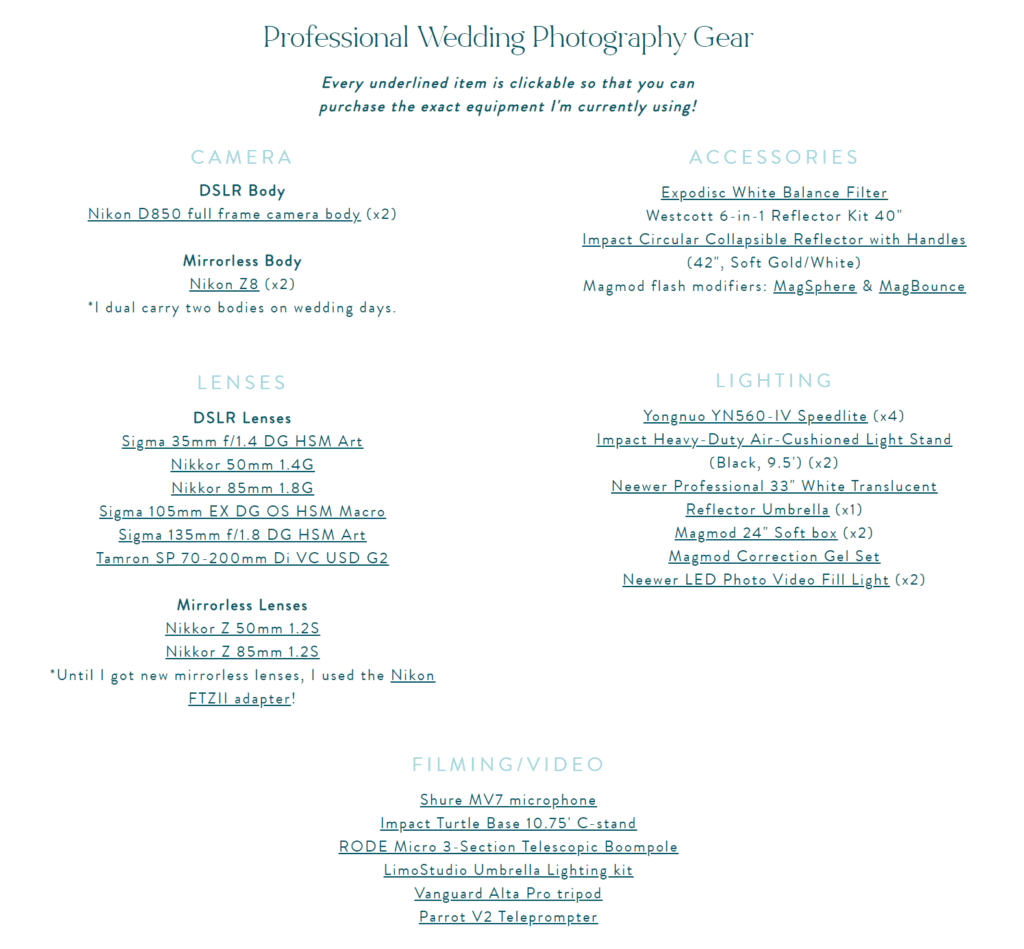
Here is just a nice, organized (because that’s just how I am!) list of all my wedding photography gear! Now I’m going to go into each of these categories and explain to you what each piece of equipment is, what I use it for, how significant I think it is, and if I know of any alternatives. As I expand my gear collection, I’ll be updating this Professional Photography Equipment page that shows everything I use: both shooting AND behind the scenes of running my business!
Camera Body (Full Frame)
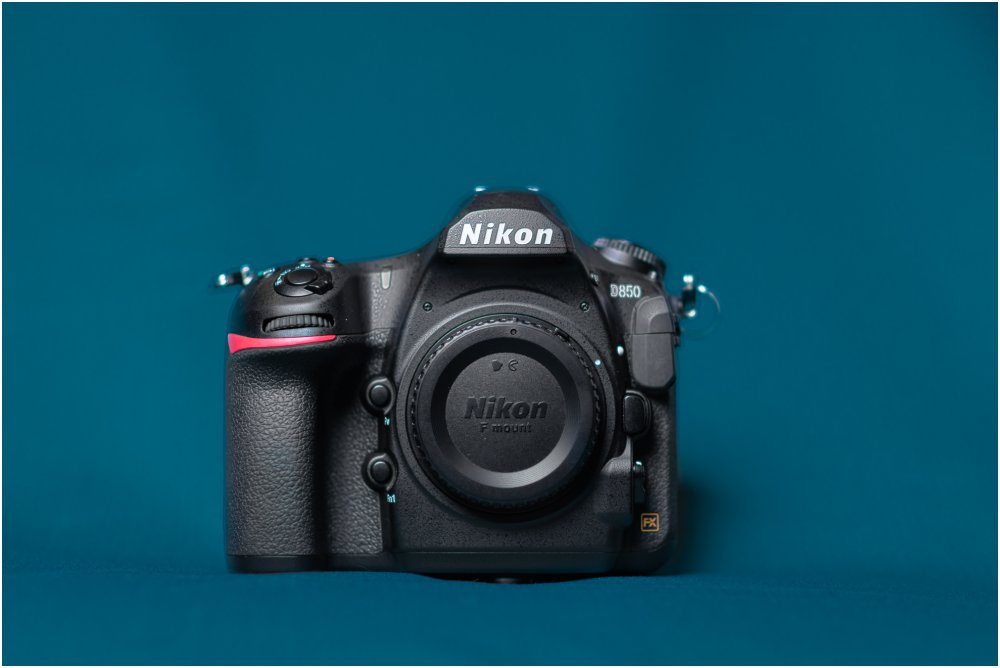
As you can see from my pretty gear list above, I shoot with two Nikon D850 camera bodies. The D850 is a full-frame, professional-grade camera body. If you aren’t sure what the difference is between an entry-level crop-sensor camera body and a full-frame, look at this handy dandy article linked here. Now I want to warn you, carrying around two camera bodies with lenses attached for a full 8 hour+ wedding can get really exhausting. During the first part of the day when things are a little slower-paced, like when I’m photographing the bridal details, I’ll stick to just using one camera body to save my back some stress.
Plenty of photographers use different models of camera bodies throughout the day, but I personally love sticking to the same model. I find that I can adjust my settings more quickly (since the buttons are in the same place on both cameras). Different camera bodies also have different color profiles. I want to make sure that if I take one bridal portrait with a camera body and then switch to the other body that has a different lens attached that I’m still getting the same type of colors in my images. Consistency is key!
Have a Back-up Camera Body
Also, remember that you don’t have to carry around two bodies the whole day. This is just a shooting preference of mine. If you are crazy fast at changing lenses you could probably swing using one body just fine. BUT, please remember this: ALWAYS ALWAYS ALWAYS have a second full-frame camera body with you. You are photographing a bride and groom’s wedding day. This can’t be re-done. You’ve got one shot. Camera bodies can and do fail unexpectedly. Be sure that you have another camera body with you in case this were to happen. You owe it to your clients to be prepared!
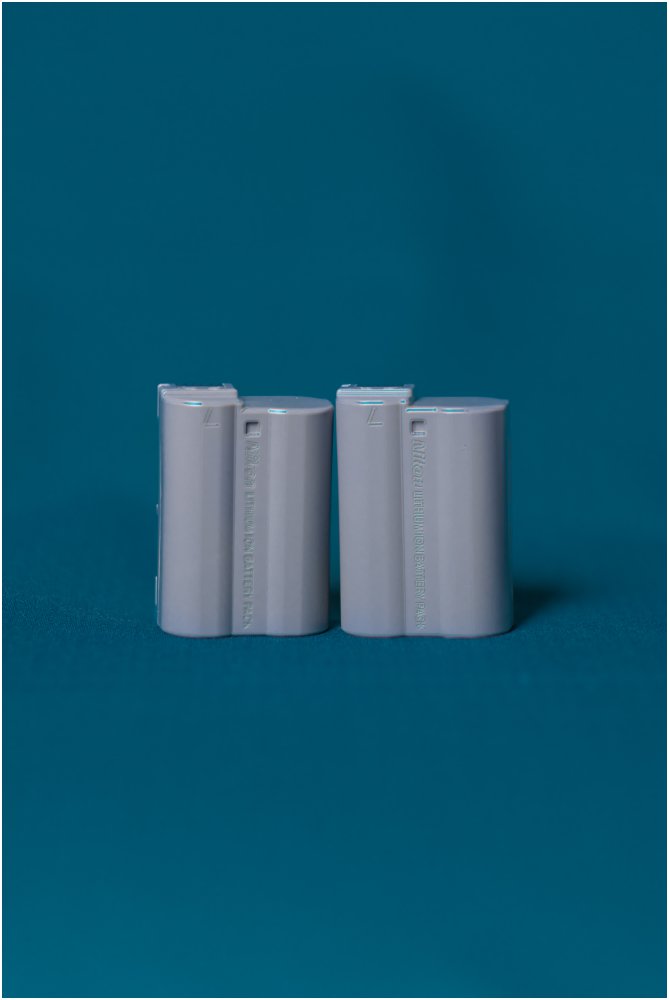
Don’t forget to have spare camera batteries with you, too! Honestly, I go to every wedding with fully-charged camera batteries in both of my cameras. It’s rare that I even have to change one throughout the day. BUT things happen. Batteries go bad. Or maybe I forget to fully-charge one. Always have a backup.
Camera Harness
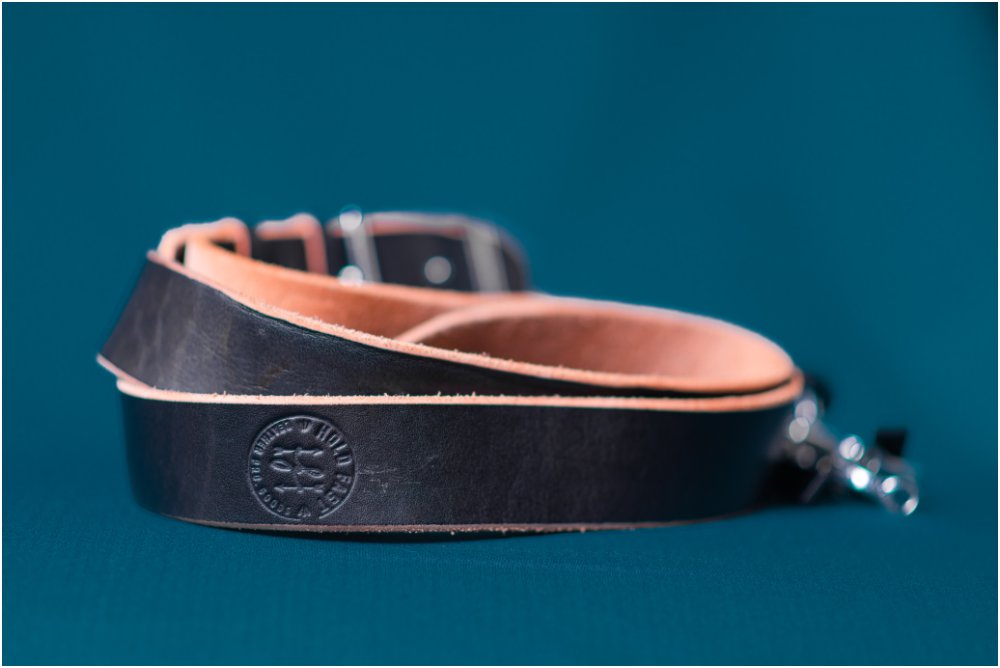
I need a way to carry around both of these camera bodies with me. When I used just one camera I would use a sling strap that went across my body. It was great. Now that I’ve upgraded to using two cameras I invested in the dual camera harness from Holdfast. I wanted a harness that would last a long time as well as look professional. I have not been disappointed! And this system is incredibly secure! The initial attachment to my camera body is great, but there is a backup clip too just to be extra safe. Love it!
Lenses (Prime and Zoom)
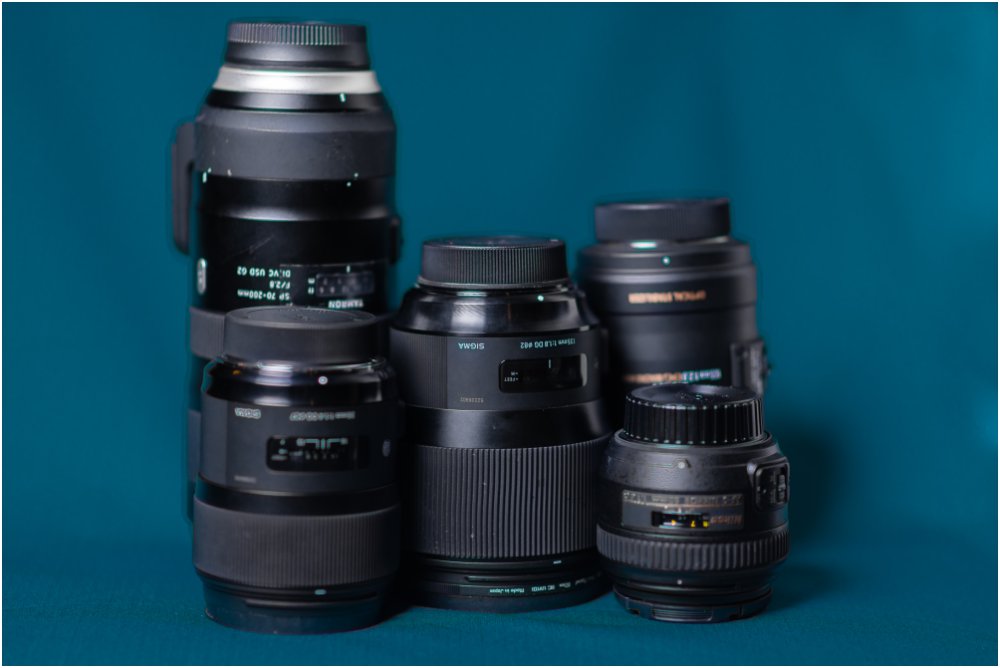
*My Nikkor 85mm 1.8 is not featured here because I used it for all of these images!*
If you missed my last Photography Education blog post, be sure to check it out! I go into detail about what I use each lens for and why!
You’ll notice that I don’t have strictly all Nikon-brand lenses (referred to as Nikkor) for my Nikon camera. I had to make very careful purchases with my money as I was slowly building up my wedding photography gear collection. After tons of research on my options, I looked for what I thought was the best value. I couldn’t afford to buy the absolute best-of-the-best, but I didn’t want to get something sub-par either. I’ve really been happy with all of the lenses I’ve chosen and haven’t regretted a single purchase so far.
Right now I don’t feel like I’m in need of any other lenses. I may upgrade some down the road, but I feel like I have every lens necessary for my style to cover the wedding day in the best way possible. Here’s a quick breakdown for what I use my lenses for throughout the Wedding Day:
The Lens Breakdown
35mm: wide portraits to capture the surroundings, large family groups, full reception room shots, reception dancing, portraits in really small spaces
50mm: portraits of family/bridal party/groups, full body bride & groom portraits, wider ceremony shots, portraits in small spaces, ceremony/reception details
85mm: portraits of smaller groups (2-6 people), bride & groom portraits, tighter ceremony/reception detail shots
105mm macro: bride & groom details (rings, cuff links, other jewelry, etc.)
70-200mm: First Look and ceremony time. I want to be able to shoot super fast and not have to swap lenses/bodies
135mm: almost exclusively for bride & groom portraits. I’ll use it for darker/smaller ceremony spaces, too.
Lighting Equipment
I know starting to work with artificial lighting both on and off camera can be SUPER intimidating. I know I felt that way. But, in my opinion, in order to capture your client’s wedding in a high-quality manner, you need to know how to use it. You may be fortunate enough to where you have ample daylight throughout the whole day and don’t need to use any lighting. And that’s awesome! BUT you need to be prepared for days when that just isn’t the case. The only way to get more comfortable with On and Off-camera flash (commonly abbreviated as OCF) is to practice with it.
Speedlights
There are lots of different options for what type of delivery system you want to use for your lighting (speedlights, strobes, etc). When I decided to invest in OCF wedding photography gear, I had a few things at the forefront of my mind: 1. I don’t want to spend a TON of money on gear when I’m still new to OCF and will ultimately develop a lighting style over time. 2. I want something simple to use and that will allow multiple flashes to communicate with one another.
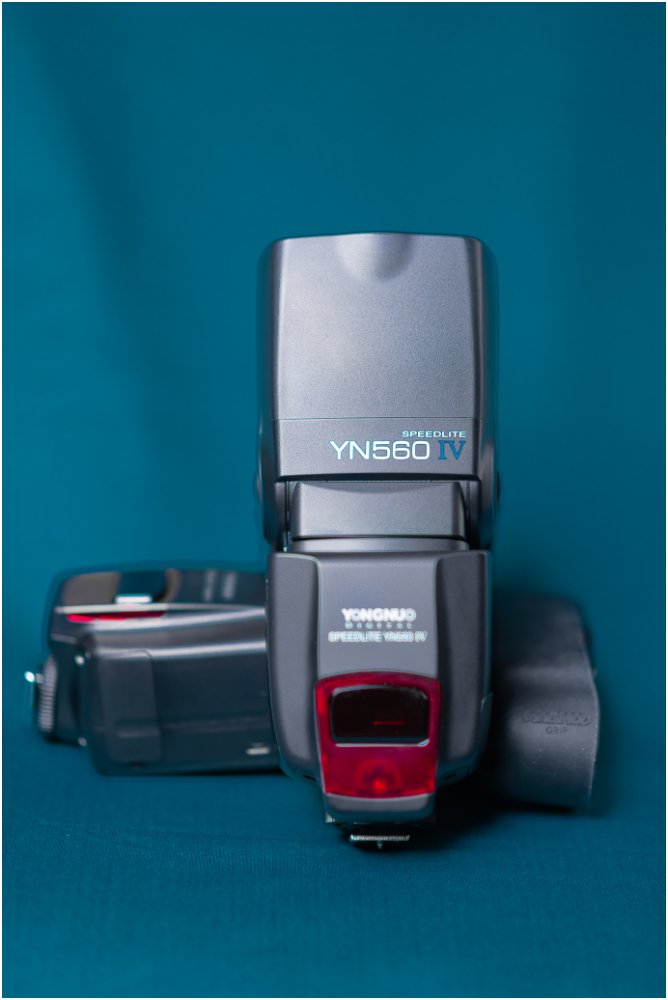
I am a part of more than a fair share of Facebook groups. Within those groups I would watch for people to post OCF-driven images and when I found a style that I really loved, I would just reach out to that photographer. How many flashes are you using? What is the brand and model? Do you need triggers to have them work together or are they built in? There was one speedlight that seemed to be extremely popular and well-loved. The Yongnuo 560 IV. I’ve owned these flashes for over a year and have NEVER had a problem with them. They’re reliable, easy to use, and don’t break the bank. Win!
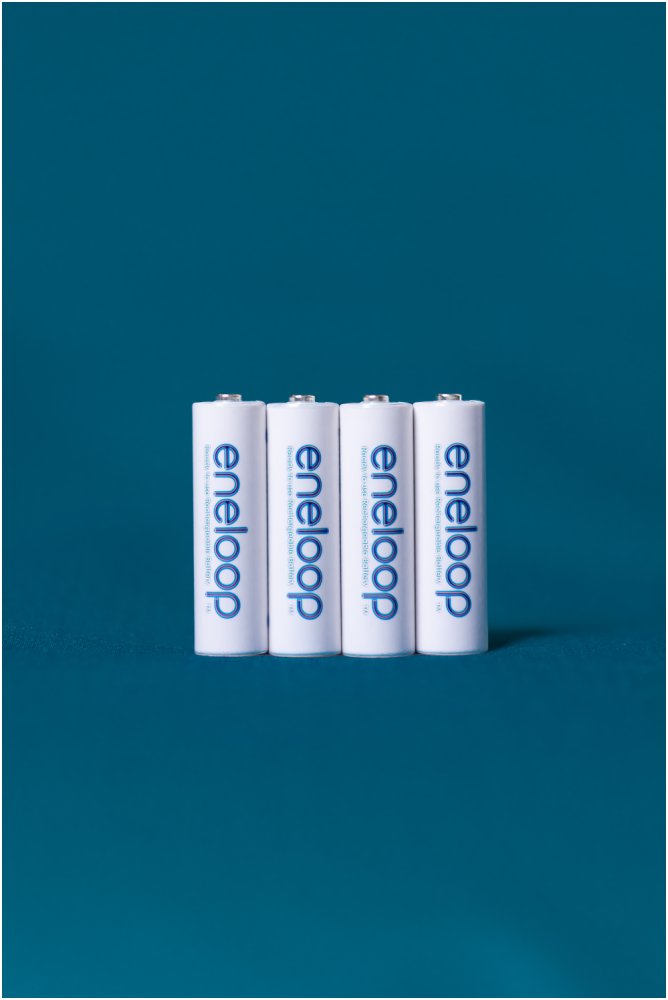
These speedlights use AA batteries. I own about 4 sets of the white Eneloop batteries from Panasonic. There are black ones as well that are a tad more expensive; those are the “pro” version. Again, I consider myself as intermediate when it comes to lighting. So I didn’t go for the more costly option. I make sure all of my batteries are fully charged when I go to a wedding. I’ve never had an issue with batteries dying too quickly and leaving me with no light.
Light Modifiers
As I start to get more and more involved with OCF, I realize that sometimes I just don’t like the way my bare speedlight with the bounce card up looks. It just looks… well… too much like flash. So I started looking at light modifiers. I have a white translucent umbrella that I use periodically throughout the night. I also use different light modifiers on my light stands as well as with my on-camera flash. These other modifiers are all by a company called MagMod. I am completely hooked on all of their equipment and have purchased the majority of what they offer. The build quality is incredible and their system integrates soooo smoothly. The two featured here are the MagBounce (center) and the MagSphere (sides).
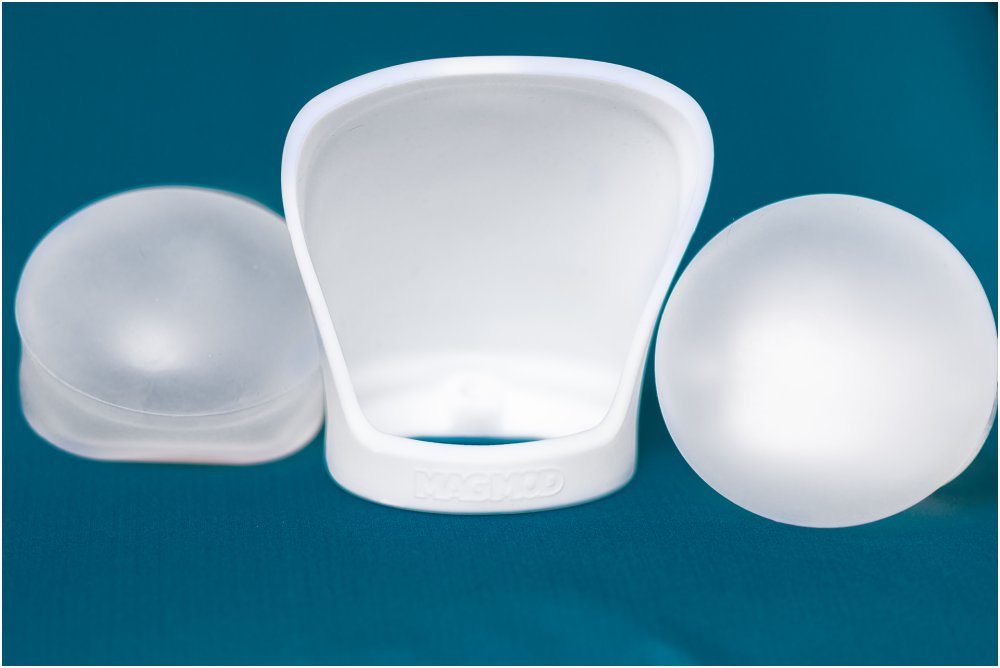
Now I wouldn’t say that light modifiers are an absolute necessity. There are countless wedding photographers that don’t use anything. Using them helps me get lighting that I find more appealing for my style. You may not ever use one and that’s ok!
Wedding Photography Gear Accessories
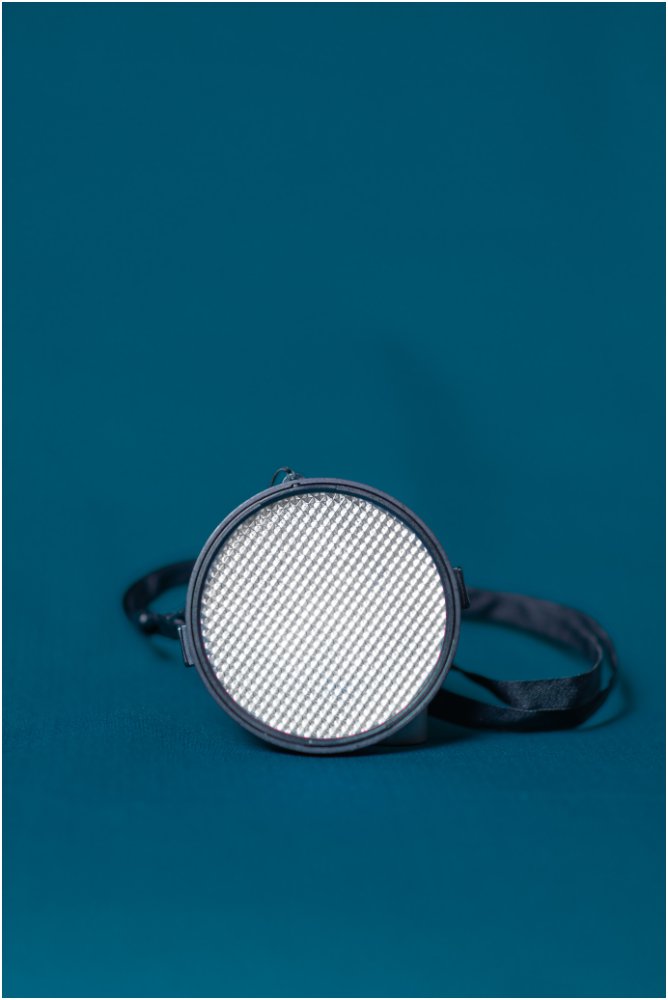
There are a few things both on and off of my list that I think deserve a quick mention. I do own an ExpoDisc. There is a detailed article on how to use an ExpoDsic for a custom white balance (and save time on editing!) here. I used it very frequently when I first started with photography and I think it’s a wonderful too. Now I don’t use it as much on wedding days and instead use a custom Kelvin temperature setting. I do, however, think it is great for newer photographers as well as to get a more custom white balance for tricky lighting situations.
Memory Cards
My camera body (the Nikon D850) uses two different types of memory cards: SD and XQD. During all of my sessions, both portraits and weddings days, I have every image copied to both cards just in case one card becomes corrupted. Better safe than sorry. In terms of storage size, I use mostly 64GB cards. I own a few 128GB cards, but they are a bit more expensive. For my SD cards, I stick to SanDisk and get the Extreme Pro version. It has the fastest read and write speeds available. The last thing I want to happen to is to be shooting a fast-moving part of the day only to go to take another shot and have my camera tell me it’s “busy.”
Photo Editing Software
Having amazing images to show to your clients is an awesome feeling, right? But there’s one thing that you’ll need to actually be able to send these files to your clients. See, your camera will record your images in a file type (if you’re shooting in RAW– which you should be!) that cannot be viewed or edited without special photography-related software. That means all your cool wedding photography gear is useless without photo editing software! When I’m ready to start editing my clients’ images, the two programs that I use most are Lightroom and Photoshop provided by Adobe.
Since expanding my business over the years, I also use Adobe programs like InDesign and Premiere Pro. For those of you that are just starting out, the Adobe Photography Plan is a GREAT place to start and have the big tools you need!
Other Wedding Photography Gear
Have a question about a piece of gear that I didn’t mention? Leave me a comment and I’ll get back to you with all the details!
And a special shout out to Luna for letting me play with my new softboxes.
I purchase almost all of my gear through B&H Photo Video and have NEVER received faulty/damaged equipment. Their prices are competitive and, most importantly, the shipping is super fast!
MY PHOTOGRAPHY GEAR
CAMERA BODY (DSLR): Nikon D850 Full-frame DSLR
CAMERA BODY (MIRRORLESS): Nikon Z8
LENSES:
35mm Sigma 1.4 ART for Nikon | 35mm Sigma 1.4 ART for Canon
50mm Nikkor 1.4 for Nikon
85mm Nikkor 1.8 for Nikon
105mm macro Sigma for Nikon | 105mm macro Sigma for Canon
135mm Sigma 1.8 ART for Nikon | 135mm Sigma 1.8 ART for Canon
70-200mm Tamron for Nikon | 70-200mm Tamron for Canon
MIRRORLESS LENSES:
*Until I got new mirrorless lenses, I used the Nikon FTZII adapter. This lets me use my older DSLR lenses with my new mirrorless camera body!
BAGS:
Suitcase Rolling Bag | Think Tank Photo Airport Security V3.0 Carry On
Side Camera Bag | Peak Design Everyday Messenger
LIGHTING & ACCESSORIES:
Yongnuo 560IV speedlight (I use 3 of these on a wedding day)
Impact Heavy Duty Light Stand (I use 2 of these on a wedding day)
MagMod diffusers: MagSphere and MagBounce
PERSONAL FILMING EQUIPMENT:
LimoStudio Umbrealla Lighting kit
My CLIENT Management Software: Honeybook (get a free trial + 50% off your first year when using this link)
My Photo Editing Software: Adobe Creative Cloud— beginners, start with the Photography Plan to get both Lightroom and Photoshop!
My Photo Delivery Software: Cloudspot (get 20% of your first year on any monthly or annual plan)
I am not paid to talk about or endorse any of these products. Some of the links above are affiliate links, which means, at no cost to you, I may make a small commission when you click the links and purchase.
Leave a Reply Cancel reply
info@christyhunter.com
Christy Hunter is a wedding and portrait photographer based in Seattle, Washington.
Inquire for more details
follow along @christyhunterphotos
Created with Showit
©2018-2025 Christy Hunter Photography LLC
| Privacy Policy
SEO Education and Services
Most well written and informative photography I have read to date. Fully useful information, very happy I ran across it.
Thanks so much, Robert! I’m glad you found some value in it!
Came across this article from a Google search. I’m trying to begin wedding photography myself next year and attempting to ascertain the essentials for my first wedding season.
I have experience with Photography, just not weddings. Would you recommend purchasing some of these items and be a wedding photographer assistant for a couple months while having my own business be on the side?
Thank you
Hey, Philip! Awesome questions!
So, as you know, weddings are a big deal. After all, you can’t repeat them. When initially getting into wedding photography, here are some of my suggestions:
1. Be upfront with any couples that want to book you. They’ll be intrigued by your lower starting price since you’re newer to weddings. But just be honest about how many weddings you have photographed as the lead photographer vs a second shooter/assistant. They may not even care and just love you and your work! But always let them know, if only just to protect your integrity.
2. Work with other wedding photographers. Volunteer to carry bags, equipment, and assist (not even photographing anything) for FREE just to get some experience with how the day flows, expectations of the photographer, etc. THEN start requesting to be what is referred to a lot of the time as a “second shooter.” This means you’ll be responsible for photographing certain parts of the day (sometimes entirely on your own), but you aren’t the lead photographer that’s in charge.
I will say that any photographer you shoot for (if you don’t have references from being a second shooter on a wedding day already) are going to want to see a portfolio and to know what kind of gear you’re shooting with. For example, wedding days can throw lots of challenges at you– like photographing in low-light situations. For this reason, most lead photographers will want to see more professional-level gear in your arsenal (like what I have linked here) such as a full-frame camera body (that handles low-light better) as well as a good variety of lenses (so that they know you have what you need to capture difference scenarios).
I started off with one full-frame body and then slowly built my lens collection up. Then, once I felt like I had all the lenses necessary to capture a wedding day in the best way possible, I purchased my second full-frame body. (<– having a body backup is NECESSARY in my opinion if you are photographing alone).
Let me know if I can help with anything else, Philip!
Thanks for the words of encouragement on on getting hired with no experience. I might be fortunate enough to be able to photograph a friend’s wedding. I’m hoping this happens so I can say I’ve shot at least one wedding. But I’ll probably still need to be someones second to get the full breath of the industry.
Never thought about volunteering just being an equipment handler. Is this a common practice? That makes me feel more optimistic about getting my foot in the door. Because the only other opportunity for photos in a wedding I’ll be able to get is one in which I’m a groomsmen ha. I might be able to get about 15 minutes of portraits with everyone after the hired Photographer has their fill.
So I’m working with a Nikon Z6 with a 24-70 mm f/4, Sigma 105 MM macro (same one you have listed), and Sigma ART 14-24mm. I have a tripod, but flash, stands, filters, diffusers, etc, I still need. Not too mention the 50 mm prime lens and true telefoto. I plan on purchasing all the lighting gear and the Nikkor z 50mm lens withing the next 6 weeks.
The Nikkor z 70-200 mm f/2.8 is quite pricey. The Tamron you mentioned is affordable though. I figure I probably have to haha the prime before I am even considered as a second shooter anywhere.
Hi again, Philip! I’ll keep my fingers crossed for you on the friend’s wedding. That’s how many photographers get started because their friends support and trust them so much. Most weddings consist of the same type of events throughout the day, but the actual flow and technical skills will constantly vary depending on the venue, time of day, etc. Being a second shooter as much as you can will certainly be beneficial!
And yes, being more of an assistant and not really shooting throughout the day can be quite common for photographers that are just starting out with weddings. You are providing the lead photographer with free and valuable assistance on a stressful wedding day and you get to absorb knowledge first hand!
With the lenses that you mentioned, I’ve got a few tips/suggestions:
-The 24-70 f/4 (in terms of wedding photography) is mainly used for small getting ready spaces where you need a wide lens as well as dancing shots at the reception. The only thing that I would say about that lens is that it’s got a high max aperture of f/4 and with Getting Ready spaces and dancing at receptions, it is VERY common to be in a low light situation. Since you can’t open you’re aperture open (Ex. f/2.8) you may struggle with noise/grain due to needing a higher ISO.
-Yay macro! There’s really nothing like it when it comes to using it for tiny details like rings, earrings, cufflinks, etc.
-With your Sigma ART 14-24mm, I don’t typically see a super wide lens like that used in wedding photography. The reason being is that once you start shooting people wider than 35mm, it can start to skew their facial features. This lens would be awesome for super wide epic location-centered shots, but I’m not sure you’ll find yourself using it a lot on a wedding day unless you’re doing large group shots.
In terms of equipment to add to your arsenal first, I would recommend:
-A Prime 50mm lens
-A longer telephoto lens for the ceremony. You could get a 70-200mm zoom or even a 135mm prime (but then you’d probably find yourself changing lenses during the ceremony unless you carry two camera bodies. It’s not a bad thing, just something to consider).
-Flashes (at least 2, I use 3) are a MUST to be fully prepared as well as at least one flash stand (I use 2). Diffusers are a nice to have, but not a necessity when starting out.
Hope that was all helpful, Philip!
Yea, the 24-70 m f/4 was the kit lens. The f/2.8 of the same focal length is 2k for the Nikon z. Many of the z series lens are expensive. I have always said that Nikon is the Mac of the camera world but the quality comes with that.
I think I was going to get the Nikkor z 50 mm prime lens, and all the lighting equipment. The 70-200 lens I will get eventually, but I don’t know if I’ll have it by my first gig as a second shooter.
The wide angle lens is actually for architecture, landscape, and astrophotography, but I figure I might be able to use it for some specialty shots.
The flash is something I plan on probably buying this week. This aspect I’m very unfamiliar with. I’ve used a flash back in highschool yearbook but that’s about it. I can definitely see having questions. Would you recommend me buying 2 just starting out? Idk how I would use 2. I can see the lead needing it if it’s in a big group or big area.
So regarding the 24-70mm lens, it is a zoom lens and, because it has more moving parts, it tends to be more expensive. If you know that you’re going to invest in a 50mm lens, you could always make the decision to invest in a prime 35mm lens if the 24-70mm isn’t in the budget just yet. I personally don’t own a 24-70mm and haven’t felt restricted by my 35mm.
If you don’t have a 70-200mm or other long telephoto lens in your gear bag, no worries! Just be sure to communicate that with the lead photographer. They’ll probably just ask you to be in charge of the wider ceremony shots that help set the scene.
And yes, that super wide angle lens can be great for some epic architectural/landscape-featuring shots!
The flashes that I have linked on my page are VERY affordable and I haven’t had a single problem with them in the 2 years that I’ve owned them. I did some research and it looks like they’re compatible with the Nikon Z6. The also have triggers built-in to them so you don’t have to buy separate triggers to get your flashes to communicate with each other. The best thing you can do is to watch some YouTube videos that walk you through the settings as well as to play with them at home beforehand so you’re comfortable making adjustments to them on the wedding day.
I typically use 3 flashes at every wedding (this is primarily at the reception). One flash is on my camera that provides some soft fill light to the front of the couple/subject in the direction that I’m shooting. A second flash is placed to the side of me with an umbrella on it that provides the main directional light to illuminate the couple and the area around them in a soft way. The third flash is towards the back of the space/area I’m photographing (usually at a 45 degree angle from the light stand with the umbrella on it). Without this third flash to help illuminate the background, the image will tend to look flat. Unless there is a SIGNIFICANT amount of ambient light in the background, your subject will appear to just be floating in a black space and, for my style, it makes for a boring image. Hopefully that explanation of my setup gives you an idea of how many you’d like to start off with!
hi’ i am a biginner and i was booked to shoot a wedding this coming august. i only own one camera body nikon d3000 with one baterries, one lense 55-200mm , one speedlighte, a drone and one 4k hd video camera, do you this this gear can make it?
Hey, Elifas! Thanks for reaching out. This is a great question. Weddings are a big deal and can’t be repeated. Therefore, I’d make sure you’re as prepared as possible. If purchasing isn’t an option right now, I would look into renting a full frame camera body along with a few lenses. A full-frame body (such as the Nikon D750, 780, or 850) can handle low-light situations way more effectively. As far as lenses go, just try to be prepared to cover a variety of focal lengths. Sometimes you may find yourself in small Getting Ready spaces where you need as wide as a 24mm or 35mm lens. Other times you may need a lens with a long reach (200mm) like during the ceremony with a long aisle.
For lighting, this can vary a lot based on the size of the room, color of the wall, height of the ceiling, etc. If the Reception area has neutral/light walls and lower/average ceilings, you could probably get away with bouncing our speedlight. BUT, if the room is larger and not ideal for bouncing, I would recommend getting AT LEAST one more speedlight to put on a light stand more towards the back of the room to give your images light and dimension.
I hope that helps and I wish you the best of luck!
Hi, I have a Canon 5D Mrk 2, Canon 16-35 f/4L IS USM, Canon 135 f/2L USM, Canon 85 F/1.8, and Canon 50 f/1.8 STM
Will sell the 16-35 as it’s too slow
The 50 1.8 STM could be used but the 1.4 would be better.
Would the 50, 135, 85 & rent 2nd body & 70-200 2.8L IS USM II or III be good for a first wedding shoot?
Hey, Andrew! Thanks for the gear question! I think that you will have a great focal length range available between your lenses and renting. The only tricky part might be not having anything wider than 50mm once you sell the 16-35. I don’t use my 35mm a ton on wedding days (it’s just not my style), but when I do need it I’m so glad I have it! Some situations are having a large group photo (like family formals) or photographing the bride and groom in tight getting ready spaces (hotel rooms, small rooms at a venue, etc.)
My big question about your 5D Mark II is this: does it have two card slots? This is so so important for weddings since they are an un-repeatable event. You want to make sure that whatever camera bodies you use allow you to shoot on two cards at a time so that you can automatically create an image backup in case of card corruption, damage, etc.
I KNOW YOURE KEPING IT SIMPE,,ARE YOU A ONE WOMAN SHOW OR DO YOU HAVE A ASSISTANT ,SECOND SHOOTER
Hey, Donavan! Great question as this can greatly impact some photographers’ approach. I have done both: I’ve photographed a full wedding day entirely on my own as well as have a second shooter with me. These days, I almost always have a second shooter. However, I do keep the time that we are apart (meaning we’re photographing entirely different things) to a minimum. I want them to be there to assist, get different angles, and candids. Sometimes we have to divide and conquer to keep the day on schedule, but my preference is to always have us together as much as possible!
I loved your post on the equipment in your bag. I’m getting back into wedding photography and was wondering if you might be able to provide me a ballpark figure in US dollars what all of this gear would cost me, so that I can get togeather the funds to purchase it all ?
Hey, Andy! I’d be happy to give you an estimate! However, even if you were to buy the same exact pieces of equipment that I use, there will be a bit of a difference. This is because some items have been out for awhile vs the “brand new technology” prices I paid several years ago. Meanwhile, other items may retain their value very well over long periods of time. But keep in mind, there are several online places that offer used equipment in good condition at discounted prices. As a rough estimation, if you were to purchase two full-frame DSLR camera bodies, all 6 lenses, 3 speedlights, 2 lightstands, one umbrella, a minimum of six 64GB memory cards, 2 additional backup batteries for your cameras, and batteries for your speedlights… it would come to about $12,800. That wouldn’t include external hard drives to store images, a proper laptop to operate editing software, external lighting modifiers, etc. Hope that’s helpful and good luck in your future pro photography endeavors!
Hi Christy,
I’ve never tried this one actually, MagBounce.
I have a feeling that it helps me with taking pictures of my jewelry in general.
Thanks for sharing a detailed info guide.
Regards, Edyta
Hi, Edyta! I think since you’ll be photographing pretty close up for jewelry pieces, either the MagSphere or the MagBounce will work great. The bounce will push forward more light than the sphere, but the sphere will produce softer light up close.