Filed in: photography tips
February 10, 2018
How to Use an ExpoDisc and the Power of a Custom White Balance
How an ExpoDisc Can Save You Editing Time
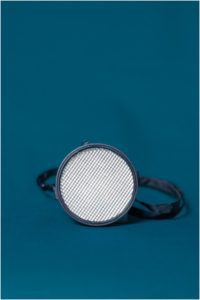
Editing. It’s something that can EASILY take up hours and hours of your time from just one session– ESPECIALLY if you are a wedding photographer. But we all know it’s a key step in providing beautiful, professional-quality images that really exhibit your own personal style. I do whatever I can to make sure I get everything right in-camera to cut down on that editing time. And hey, that means you get your images faster and enjoy them sooner! Win win. So when I first heard about an ExpoDisc I was really excited! The ExpoDisc is a tool that allows you to set a custom white balance AND exposure (two VERY important photography aspects); nifty. So I ordered one. And then, of course, waited (impatiently). I tore open the box, took it out of its case, and then…. well, then I had no idea what to do with it.
How does it work? Where do I stand? How do I even create a custom white balance? Well, I eventually figured it out. So now, for your fellow Nikon shooters out there (Canon and Sony, your steps should be pretty similar but might vary a tiny bit), I’m going to save you the struggle.
**Now, a little side note here, photographers. If you don’t already have an understanding of the 3 elements of exposure (aperture, shutter speed, and ISO) and how they work together, I would suggest you read up on that first. Also, I’m only going to walk you through my typical step-by-step process; you may end up setting one element before the other depending on the shooting situation. Ok, now lets get to it!
A Step-by-Step Illustrated Guide on Using the ExpoDisc
Step One:
Stand next to the person/object you will be photographing. Then point your camera in the direction that you will be standing/ shooting from. This is very key. You want to be setting your custom white balance and exposure based on the light that will be hitting your subject. If you were to do this standing in the spot you would be photographing from, then your settings would be determined by the light that is hitting you and not your subject. That won’t do us any good.
Step Two:
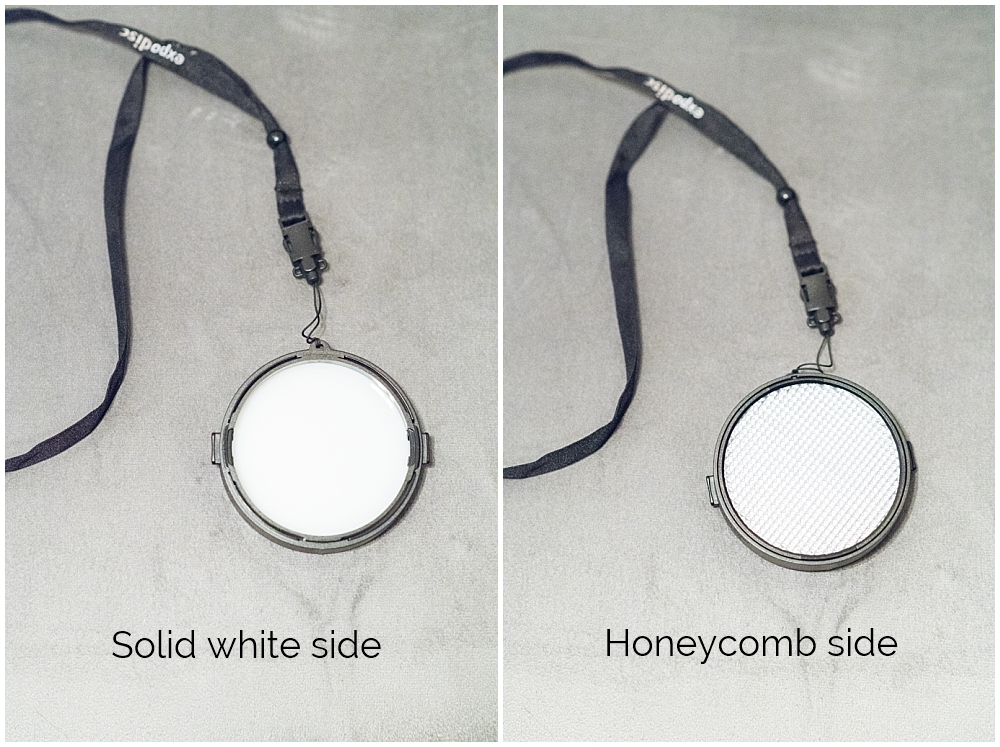
Place the ExpoDisc up to your lens and cover your lens as much as possible. The solid white side should be facing inward towards your lens and the clear honeycomb side should be facing outward. *The ExpoDisc will not leave your lens until you are completely finished. The whole goal when you are setting this up is to get your camera’s meter to zero.
Step Three:
Set your desired aperture. This varies depending on what you’re shooting and your style.
Step Four:
Set your ISO. Be sure to keep this number as low as you think you can based on your current lighting situation so that you minimize the noise in your images. Don’t worry: you can go back and change this later in a moment if you need to.
Step Five:
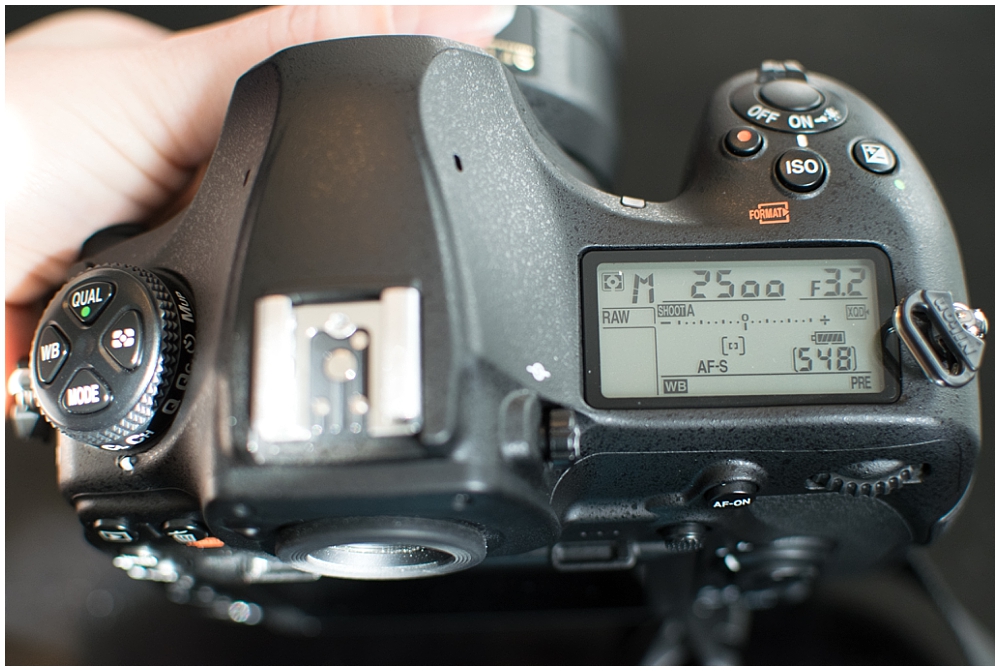
Set your shutter speed. Again, this will vary based on what your shooting (stationary objects vs moving ones, etc.). This is when you really need to pay attention to your camera’s meter. Once you’ve adjusted your shutter speed so that the line is centered on the meter at zero, check what your number is. A good rule of thumb is to have you shutter speed be at least twice what your lens’s focal length is (For example: Using a 50mm lens your shutter speed should be 1/100 or faster.) Now remember, if you are shooting a lot of action, you will need a high shutter speed so check to see if the number you are at when metered to zero is sufficient. If it isn’t, read Step Six; if it’s good, move on to Step Seven.
Directly below your shutter speed you see a series of dotted/dashes with a ( – ) sign on one end and a ( + ) sign on the other. This is your camera’s meter that you are trying to get to zero (right in the middle). The closer you move to the center, the more those heavy dashes will disappear.
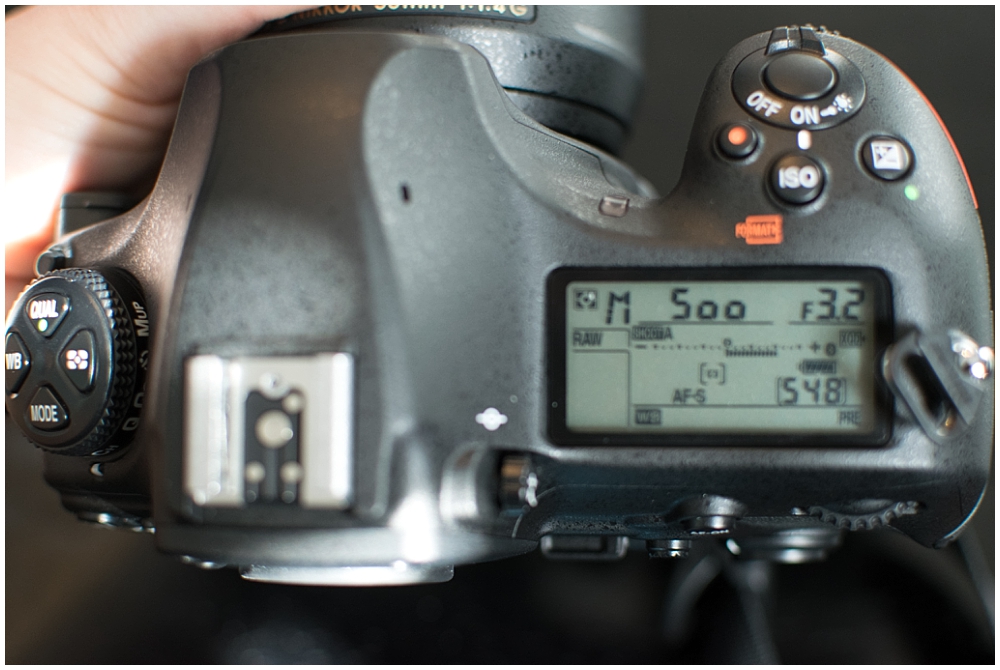
This is what your meter should look like when it is lined up to zero in the middle.
Step Six:
If you need a higher shutter speed than what you got when you set your meter to zero, go back and bump up your ISO. Then go back to Step Five, set your shutter speed, and make sure it’s sufficient.
Step Seven:
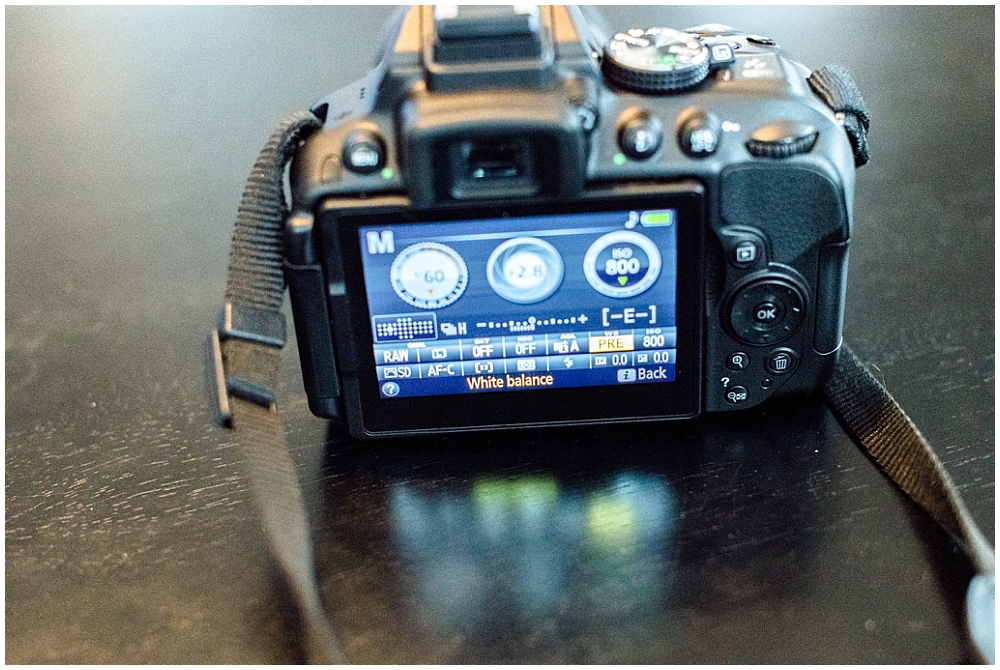
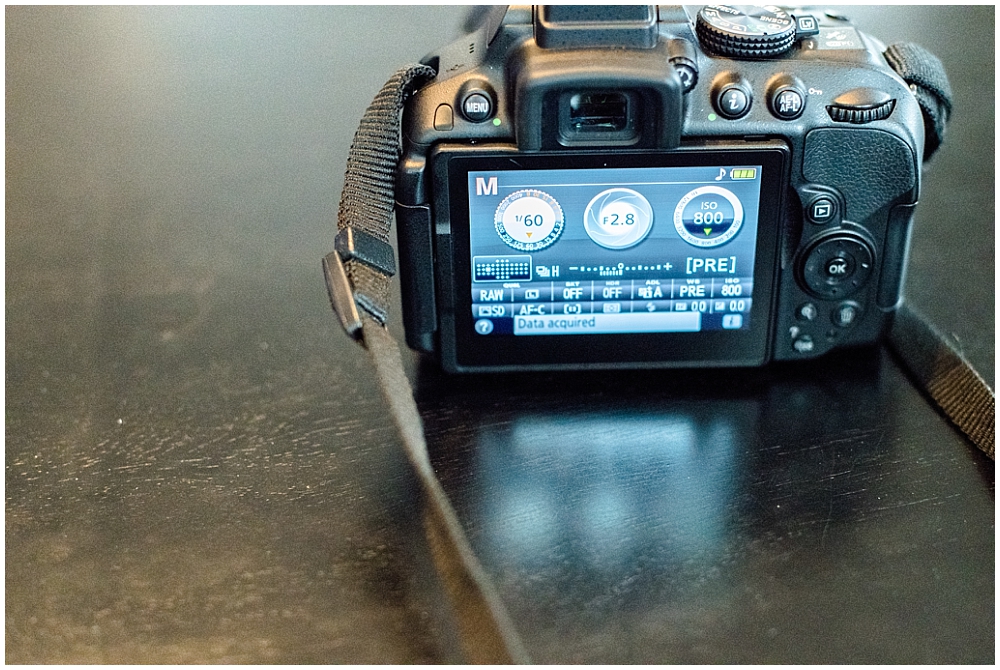
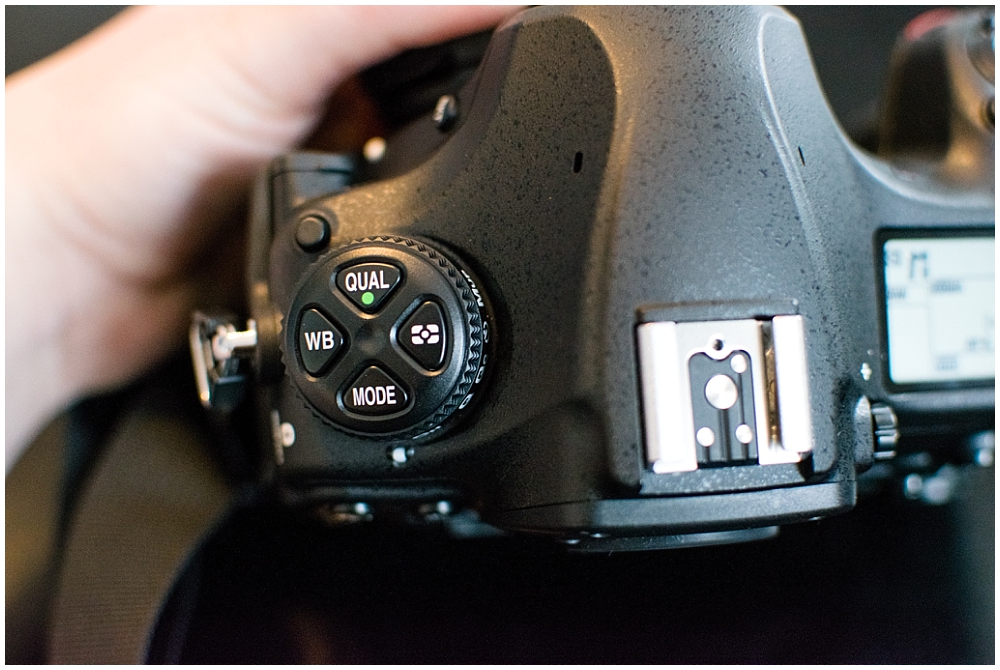
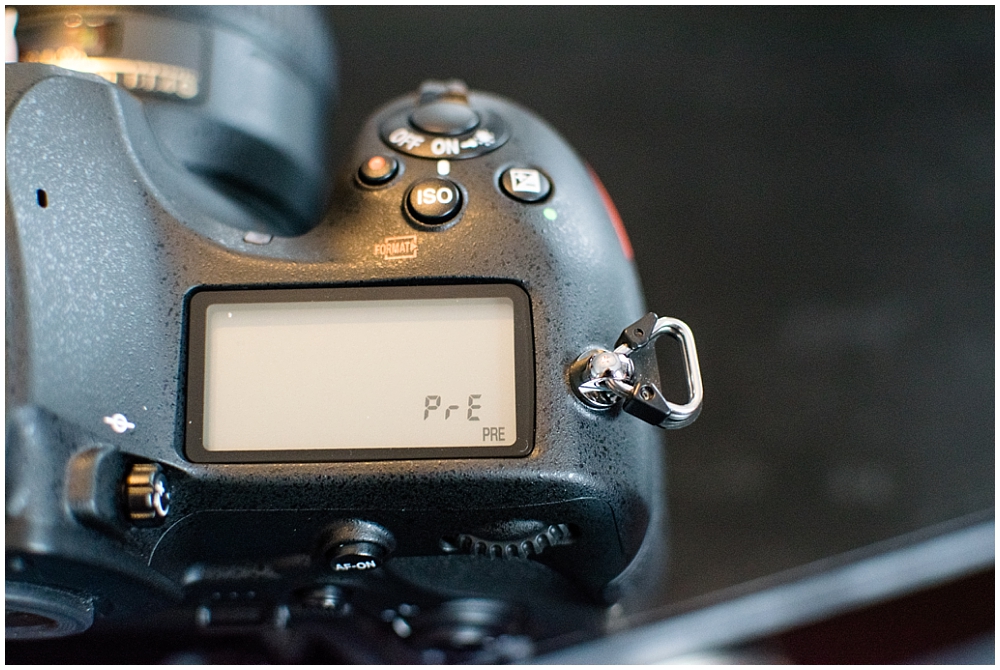
For Nikon users, look for the option in your menu’s White Balance category for the word PRE. Some models will have this directly on the main menu screen. Others may have a shortcut button directly on the camera body. Hold that PRE button down until it starts flashing. Then press your shutter. If everything was done correctly, you should get the message “GOOD” (or “Data Acquired” on a crop sensor camera), meaning that your settings were accepted. And BOOM! Custom white balance and exposure are set!
Location of the PRE option on a cropped sensor camera. Hold down the “OK” button to get it to start flashing.
“Data Acquired” confirmation on a crop sensor camera.
Location of the WB button on a full-frame camera.
After holding the WB button down your top menu will start to flash “PRE.”
Once your settings are accepted, you will see the word “Good” on a full frame camera.
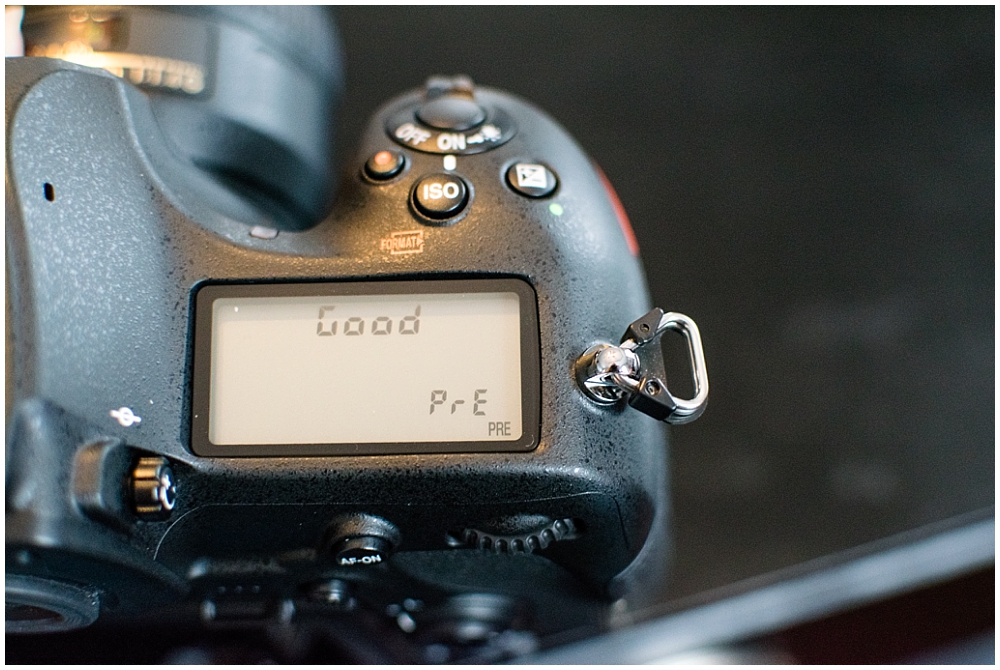
*Now remember, these custom settings are all based on your current lighting situation. As the light changes, be sure to reset everything with your ExpoDisc to ensure a correct white balance and exposure.
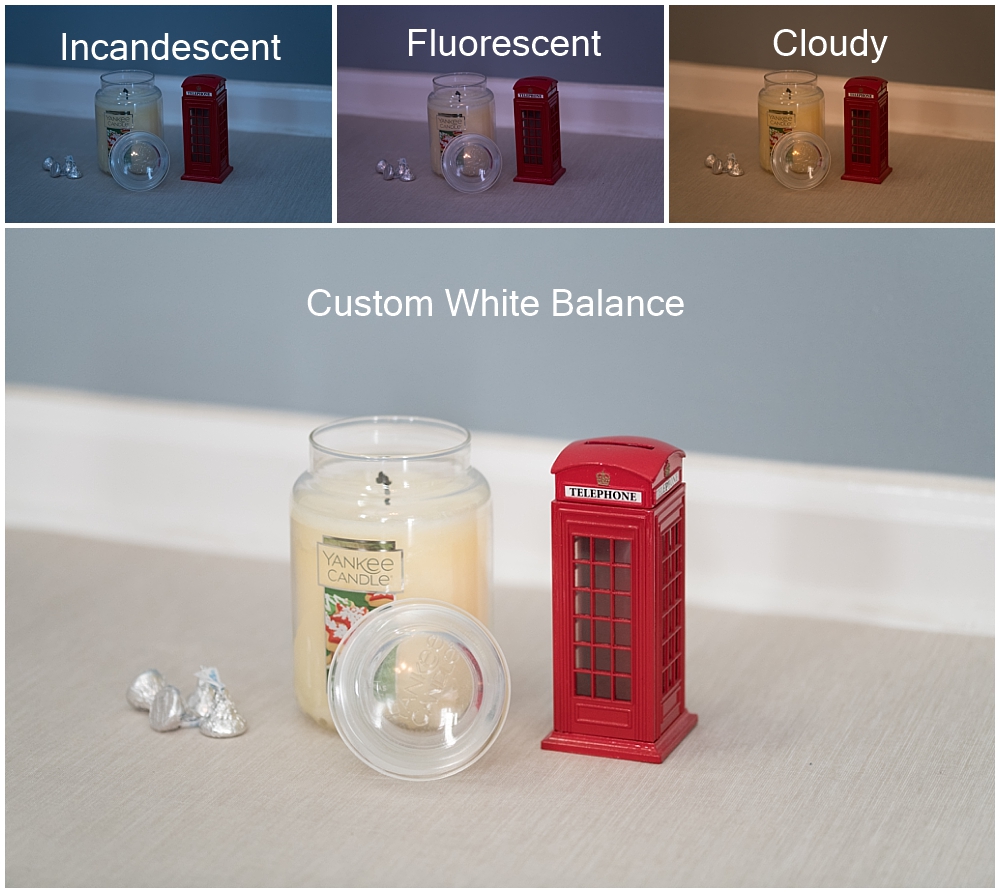
Comparison Photos of Your Camera’s White Balance Settings vs the ExpoDisc
Here are a few pictures of different white balance settings you will find in most camera’s options. Needless to say, I think they are a great example of why a custom white balance and exposure setting with the ExpoDisc is so helpful.
Photographers, I hope this helps you out and cuts down on your editing time. And to everyone else who made it to the end of this tutorial, I hope you understand just a bit of the insanity that is going through my mind at your session 😉
Pick up your own ExpoDisc from Amazon here!
Want to learn what my lens preferences are and which lens I think you should buy first? Check out my Lens Preferences post!
I do not get paid to talk about or endorse any of these products. Some of the links above are affiliate links. This means, at no cost to you, I may make a small commission when you click the links and purchase.
Leave a Reply Cancel reply
info@christyhunter.com
Christy Hunter is a wedding and portrait photographer based in Seattle, Washington.
Inquire for more details
follow along @christyhunterphotos
©2018-2026 Christy Hunter LLC dba Christy Hunter Photography
Privacy Policy
SEO Education and Services
[…] my list that I think deserve a quick mention. I do own an ExpoDisc. There is a detailed article on HERE. I used it very frequently when I first started with photography and I think it’s a wonderful […]